"Bits of bacon are like the fairy dust of the food community."
Of course they are. What else would the Pork Fairy sprinkle? "Bippity, boppity, bacon," as the man says.
To polish rocks, nature uses water, sand and motion.
To polish ideas and identities, we use the same approach
— a mix of inspiration, grit and energy.
"Bits of bacon are like the fairy dust of the food community."
Of course they are. What else would the Pork Fairy sprinkle? "Bippity, boppity, bacon," as the man says.
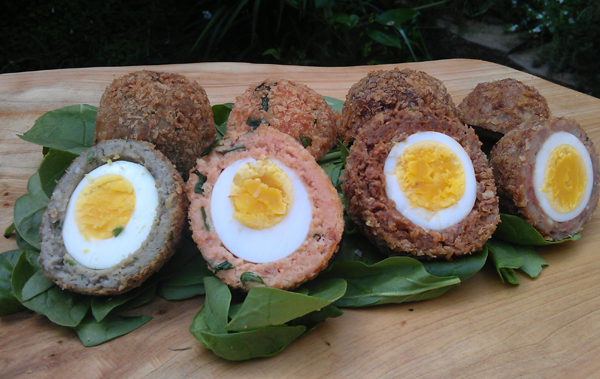
 Scotch Eggs (from left) vegetarian, smoked salmon, merguez & pork sausage
Spring is upon us. The days are getting longer, the sun getting warmer and the garden is getting weedier by the day. But as the soil warms and the flowers poke their colorful heads up out of the ground, I start fielding questions from family and friends alike, “When are you going to make brunch?”
Some people plan their garden, and some plan their brunch menus. I already know that this year I will be growing green beans and okra, both of which will be pickled and served up in the brunch-time Bloody Marys and the pineapple sage and boxwood basil will find it’s way into other fun libations. But to eat, I wanted to try my hand at Scotch Eggs.
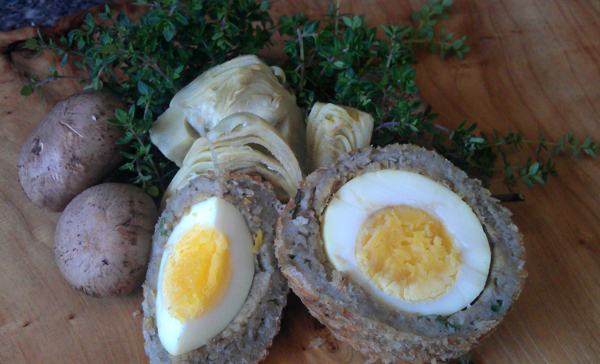
 Meatless Scotch Eggs, with mushroom and artichoke.
Scotch eggs are fun to make and, once you have the technique down, you can try all kinds of flavors. To kick off the Scotch Egg escapades, I tried out four difference outer layers: classic pork sausage, lamb merguez sausage, smoked salmon and a vegetarian option, artichoke and mushroom.
The trick, especially when going outside the classic sausage outer layer, is getting the consistency right. For example, most fresh Italian style sausage can be used directly cut out of it’s casings, but for merguez, which often has a drier texture, you may have to add just enough beaten egg so that it sticks together and binds to the egg and itself. For the smoked salmon “mixture” I ground smoked salmon trimmings in a food processor with egg, fresh ground pepper and some panko bread crumbs. When I had a “sausage-like” consistency, I stirred in some chopped spinach. For the vegetarian option, I gently sautéed artichoke hearts with chopped button mushrooms and then ground them up with enough egg and panko until the consistency was “sausage or stuffing-like.”
After coating each peeled, hard-boiled egg in it’s outer layer mixture, each egg was dipped in beaten egg, then rolled in panko bread crumbs and they were ready for the fryer. I kept the fryer on medium heat and fried each egg one at a time. Truth be told, they were pretty large so I didn’t want to jeopardize their shape or make my fryer over-flow. Just a couple minutes, gently turning the egg until they are cooked throughout, then gently scooped out to rest and cool on a bed of paper towels.
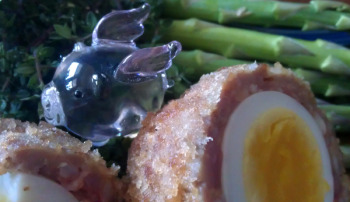
 Traditional Scotch Egg, Pork Fairy approved.
Golden brown and a perfect blend of the crispy panko coating and the tender inner egg, a perfect set of Scotch Eggs!
I’ll be taking a set of these eggs to Easter Brunch to share with friends. For those guests who don’t eat pork, there are the merguez, salmon or vegetarian eggs. But, we all know which Penelope the Pork Fairy’s favorite will be!
It’s an understatement to say that bacon is one of the most cherished and sought after ingredients in my home kitchen. Its added to so many things, I can’t even begin to list them. But we have always had a small problem in that my youngest daughter is allergic to nitrates. I’ll spare you the details, but lets just say it’s been enough to put her off most processed meats “just in case.” It’s also affected my grocery bill. No run-of-the-mill ham, charcuterie or bacon for us. Nope — just the good stuff!
So that got me thinking: I’m a chef and a mom, with a backyard cob oven and an assortment of barbecues. It’s  time to make our own bacon!
Step One: research, research & more research
So how DO you make bacon? What are the various cure processes, times and ingredients? How long do I smoke it, with what wood, and at what temperature?
All these questions led me to many wonderful online bacon references that I used to piece together a bacon plan. (see end of post for a list)
Step Two: meat + salt & other stuff + time = “when do we get to eat it?”
meat
I took a friend to a wholesale market, and on the way I explained the bacon plan. I had not thought about actually looking for the pork belly yet. I mean, after all, I hadn’t settled on a cure!
As we toured the meat section of the market, she stopped in her tracks and said, “Hey, Polly, is this what you are going to use for your bacon?” Yup, there it was: one single pork belly (half) sitting right there. I couldn’t believe that I had just walked past it, not even giving it a second glance.
So, now the pressure was on. I couldn’t ignore the pork belly, and I had a witness. Given that she had to listen to all my glorious planning while in the car, I had to do it. No choice. Buy the belly.
salt & other stuff
I had not yet ordered any curing supplies, so I scrambled down to my pantry and found a bunch of kosher salt, black pepper and sugar. Internet, don’t fail me now! In good seat-of-the-pants chef style, I put together a dry cure recipe and set out to start the bacon project.
time
Each day I checked the cure, drained off liquid and reapplied the mixture. This went on for four days. Admittedly, I am still unsure of this actual step and look forward to playing around with time and the cure recipe. It looked good, smelled very nice and thankfully the look of a slab of meat covered in salt seemed to keep the teenagers at bay. But I did learn something. This type of project, as far as teenage appetites are concerned, is like taking a long road trip. It’s a culinary version of “are we there yet?” just transformed into “when do we get to eat it?”
Step Three: smoking
When the bacon was ready, or at least when I thought it had sat long enough in the cure, it was smokin' time. Before you can start to smoke the bacon, it has to dry. Putting wet meat into a smoker is definitely not an option. The meat needs to air dry so that a nice pedicure of proteins form on the surface and allows the smoke to penetrate.
The thought of air drying the bacon slabs in my wine cellar was appealing in sort of a romantic way. After all, it's cool, has good air flow and who doesn't fantasize about having a cellar full of wine and air dried meats....but I digress.
 My cellar is probably a fine place for the bacon, but it was winter and the pantry is next to the cellar, but boasts of a finished floor and ceiling. The pantry won out.
The ambient temperature of the pantry was pretty cold, but I installed a small fan just to keep the air moving. The next problem was where and how to hand the meat. I had a handful of "s" hooks, so I knew I could hang it, but what to hang it on? Solution: an accordion style laundry drying rack. Perfect!
When the meat was dry, I put it back into the refrigerator before setting out to create the smoke.
Before I invest in a dedicated backyard smoker for the foreseeable vast volumes of bacon I will ultimately need to produce to satisfy the teenagers, I figured I would try to transform my gas grill into a temporary bacon makin’ machine. Since it has a thermometer on the outside and staggered inside racks, I reasoned that this would allow me to “hang” the bacon and watch the temperature without having to lift the cover and let out the precious smoke. I started with soaked apple wood chips smoldering away in a heavy tin. Once I placed the bacon and closed the lid, it was time to wait it out.
Handfuls of chips and 4 hours later, we couldn’t wait any longer. It smelled so good; we just had to get to that smoky slab. We took the pieces out and put them into the refrigerator to firm up before trying our hand at cutting strips.
The belly firmed up and was a beautiful creamy color, not very “smoky” looking, so we cut it into strips with a very long, sharp slicing knife. It was pretty difficult and each family member figured they could do it the best. The result: a stack of scraggly looking, irregular bacon strips. No matter, once in the frying pan it all just starts to look delicious.
Results
Good. Nice pork taste and color but very salty and not quite as smoky as we would have thought. I expected the meat to turn browner than it did since I didn’t use any type of saltpeter. Compared to store bought, run of the mill bacon, ours took longer to render the fat and it seemed to go from limp to crispy in a flash.
All in all, this was a good result for the first attempt. Over the next few weeks, we made our way through the slabs, making sandwiches, breakfasts and stir-fries. The rind was sliced off and put into stews, soups and pots of beans. The fat from all our cooking was collected and stored for a future tamale project.
We will definitely try again, very soon in fact. I plan on lining up a dry vs. wet cure-off. Our days of playing with bacon are here to stay.
http://keepingthefarm.blogspot.com/2011/03/curing-bacon.html
http://www.robbwolf.com/2011/05/20/the-path-to-culinary-bliss-home-cured-bacon/
http://nchfp.uga.edu/publications/nchfp/lit_rev/cure_smoke_pres.html
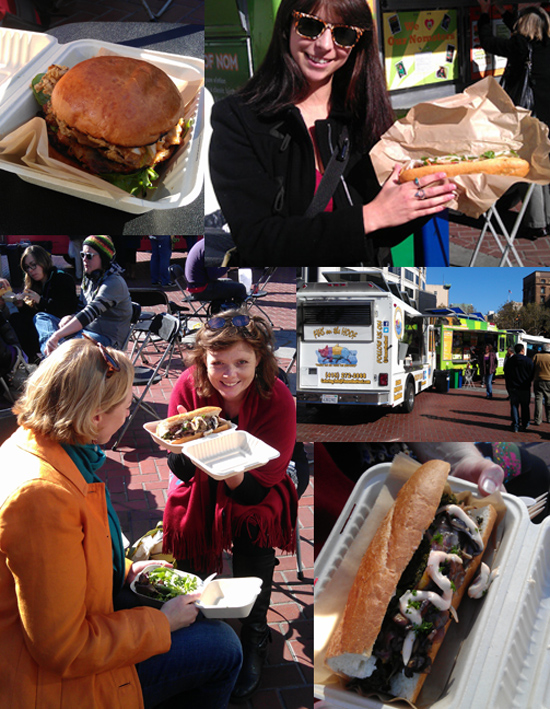
 Off the Grid SF "is your roaming mobile food extravaganza -- bringing you delicious food, with free sides of music, craft and soul."
Yesterday at UN Plaza in San Francisco, it was lunch for the Polish team and friend Kelsi Boyle, who took a break from her activism with Woman Care Global to join.
In the lunch line-up was: a grilled pork banh mi from Nom Nom, and from Fins on the Hoof a braised kale, carmelized onion and Irish cheddar sandwich and a crispy pork belly with fried oysters and kimchee relish sandwich (which was just as out of control as that sounds).
We'll be back...